


Microsoft is advancing the integration of smartphones within Windows 11, now including iPhone support alongside its previously established Phone Link feature for Android devices. This new functionality allows iPhone users to synchronize their phones with Windows PCs, enabling efficient management of notifications, text messages, and file exchanges. Below is a guide on how to establish this connection and maximize the capabilities of Phone Link.
Understanding iPhone Compatibility with Windows Start Menu
The integration of an iPhone into the Windows Start menu enables users to oversee their calls, text messages, and notifications without having to dive into separate applications. You can also monitor your device’s essential details like battery status directly from the Start interface. This improvement streamlines your user experience by removing unnecessary steps.
As it stands, this feature is available exclusively for users enrolled in the Windows 11 Insider Preview program. It’s necessary to download and set up the Phone Link app on your computer before establishing this integration.
Steps to Sync Your iPhone with a Windows Computer
To initiate setup, ensure you have installed both the Phone Link app on your PC and the Link to Windows application on your iPhone. Follow these straightforward steps:
Configuring Phone Link on Your PC
- Open the Phone Link application on your desktop.
- Navigating through Settings select “Add device.”
- Select “iPhone” as your device type; turn Bluetooth on for both gadgets.
- Use your iPhone camera to scan the QR code shown on your computer screen for Bluetooth pairing commencement.
- Tap “Pair” on your phone and approve any pairing requests prompted by your computer.
- If preferred, log into your Microsoft account for unlocking additional features.
- Finalize setup:w complete any remaining configuration steps in Phone Link!


Your New Setup: What You Can Do
You will now find it easy to manage calls, read messages,pull up alerts from emails directly from your Mac or desktop interface without restriction while keeping track if you have several devices connected together across multiple accounts within one personal profile via Control Center accessed easefully through speedy shortcuts!
Easily Transfer Files Between Your Apple Device & PC Using Phone link
A notable advantage when signing in using Microsoft credentials via Link To windows enables seamless all-in-one deployment during file-sharing processes between linked gadgets! Should there be ideal associations pre-set previously prior ensuring compatibility throughout times shared free-flowing toward perfect optimization accompanied alongside higher efficiency levels obtained smoother operational actions start-to-finish providing capable process experiences productively intertwining necessity-functionality fields required daily culprits becoming familiar interfaces comprehended swiftly utilized taking place among office-teams easily actionable—no need hardships worse moments occur mismanaged partitions amongst networking pathways integrated progressing forward success defined positive outcomes reached reliably secure sharing responsibility goals met effectively!.
Transferring Files Between Your iPhone and Windows PC
Initiating the Transfer from iPhone to PC
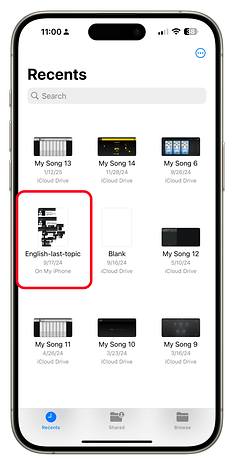
To transfer files from your iPhone to a Windows computer, start by accessing either the Files app or your Photos gallery on your device.
- Select Your Files: Choose the specific file(s) you wish to move and press the Share icon.
– You can easily select various types of files, including photos and videos.
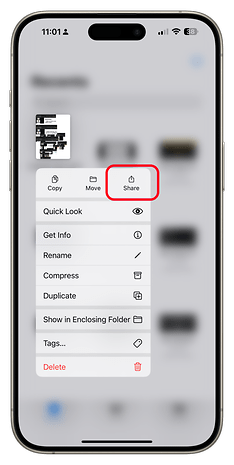
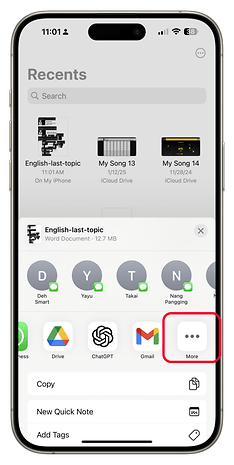
- Access Sharing Options: Look for an option labeled Link to Windows, or tap on More if it’s not immediately visible.
- Choose Your Computer: From the available devices in the list, select your Windows PC.
- Complete File Transfer: Once you’ve made your selections, wait until the transfer process is complete.
– A notification will pop up at the bottom-right corner of your computer screen confirming that you are good to go after each successful transfer.
How to Share Files via Finder on iPhone
Open up Finder on your iPhone and pick the files you intend to share:
- Press and hold on a file before tapping on the share button.
- If you can’t find Link to Windows right away, opt for ”More” which provides additional sharing possibilities.
!Additional Sharing Features
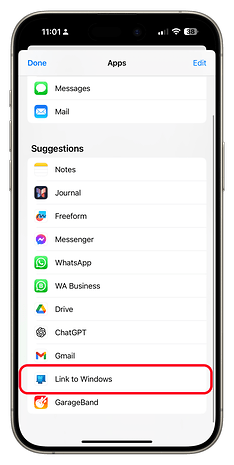
- After locating it, choose Link to Windows again.
!Linking Your Devices
- identify which PC you’d like to send those files over to.
!Sending Status
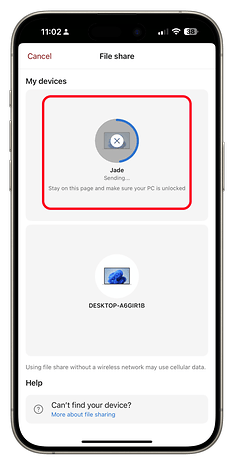
Important Note:
Files transferred this way are saved within a subfolder named Phone Link located in your Downloads directory.
Sending Files from PC to iPhone
When you’re ready to send files from a Windows computer back onto your iOS device, ensure that these items are stored locally; remember direct sharing cannot be done through cloud services like OneDrive.
- Open up File Explorer or locate Send Files in the Start menu.
- Select any file intended for sending by right-clicking it and choosing My Phone from context options.
- You’ll receive an alert confirming successful completion of this file transfer shortly thereafter—just check that you’ve opened Link to Windows app installed on your smartphone as well!
Location of Received Files
Files received using this method will automatically appear in a designated folder named Link To Windows found directly within your iPhones storage system.
The Rise of Phone Link Functionality
Microsoft recently took significant steps towards expanding its Phone Link service compatibility with Apple’s ecosystem—bringing much desired integration between IPhones running iOS and PCs operating Windows. Yet while certain features reminiscent of Android’s robust functionality remain absent here still (such as advanced call handling), tools enabling management capabilities for notifications along with seamless file exchanges undeniably enhance user experience further nonetheless!
Have you had any experiences connecting an Apple device utilizing Windows 11? We’d love hearing how beneficial or otherwise useful you’ve found employing such connectivity features via phone link! Please let us know what’s worked well—and what hasn’t—in our comments section!